
Tips Before You Start Your Latch Hook Kit: A Beginner’s Guide
Tips Before You Start Your Latch Hook Kit: A Beginner’s Guide
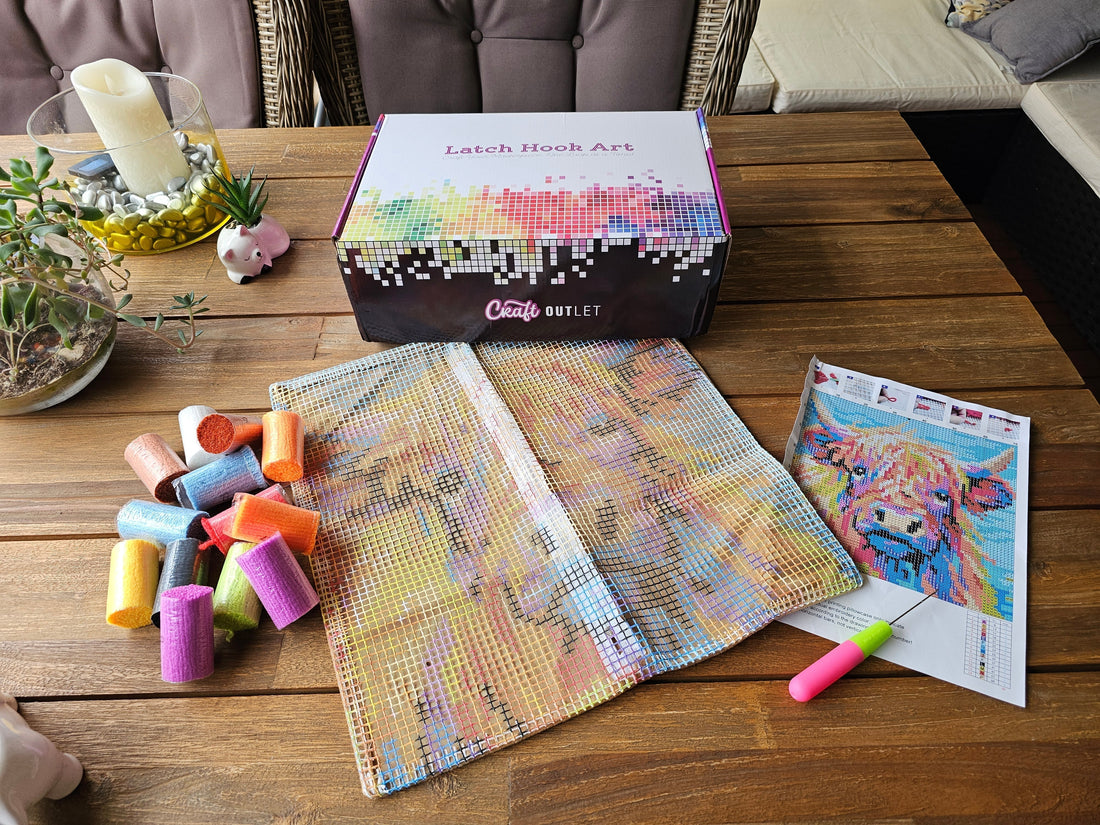
So, you’ve got your brand-new latch hook kit—exciting! 🎉 Whether this is your first time trying latch hooking or you're a seasoned pro, a little preparation can make the experience smoother, more enjoyable, and frustration-free.
Before you dive in, here are some must-know tips to help you get started on the right foot.
1. Set Up Your Crafting Space 🏡
First things first, find a comfortable, well-lit space where you can work without interruptions. You’ll be spending time on this project, so a good chair or crafting lap desk and a clutter-free surface will make a big difference.
✅ Good Lighting – Natural light is best, but a bright lamp works too!
✅ Comfy Seat – You’ll be sitting for a while, so make sure your chair is supportive.
✅ Flat Surface – A table or lap tray helps keep everything organised.
✅ Storage Box or Zip Bags – Keep your yarn pieces neat and prevent them from tangling.
💡 Pro Tip: If you have pets, store your yarn away when you’re not working on your kit—cats love yarn a little too much! 😹

2. Organise Your Yarn First 🎨
Your kit comes with pre-cut yarn in different colours, and trust us—you’ll thank yourself later if you sort them before you start.
🔹 Separate your colours into small piles or use ziplock bags.
🔹 Match the colours with the printed chart (if your kit has one).
🔹 Use a muffin tray or small containers to keep colours from getting mixed up.
💡 Pro Tip: If two shades look similar, hold them under a bright light to spot the difference.

3. Mastering the Latch Hook Tool & Technique 🔧🎯
Your latch hook tool is your best friend in this project—it’s what helps you secure yarn to the canvas. Here's how to hold it correctly and use it properly for the best results.
Step 1: Hold the Latch Hook Tool Properly
✔️ Grip it like a pen or pencil—light but firm.
✔️ Make sure the hook is facing upwards to help catch the yarn.
✔️ Work in a comfortable position to avoid hand fatigue.
Step 2: Latch Hooking in Four Simple Steps
1️⃣ Insert the Hook – Push the latch hook tool through a hole in the canvas from front to back.
2️⃣ Loop the Yarn – Place a piece of yarn under the hook, making sure the ends are even.
3️⃣ Pull the Hook Back – Gently pull the hook back through the hole, bringing the yarn with it.
4️⃣ Tighten the Knot – Release the latch and pull the yarn snugly to secure it in place.
Once you get the rhythm, it’ll feel like second nature!
💡 Pro Tip:
✔️ Work row by row to keep things neat.
✔️ If the latch hook isn’t catching the yarn, try pulling the hook slightly slower and making sure the yarn is fully looped in the hook before pulling through.
✔️ Don't pull too tight—your knots should be snug but not overly tight, so the yarn stays fluffy.
4. Understanding Your Canvas 🖼️
Your canvas is made up of a grid of holes where you’ll be attaching your yarn. Some kits come with a printed pattern, while others require you to follow a colour-coded chart.
🔹 If your kit has a printed pattern, work from one side to the other in sections.
🔹 If your kit uses a chart, you may want to mark off completed sections as you go (a washable marker works well!).
🔹 Rolling the edges slightly can prevent the canvas from curling up while you work.
💡 Pro Tip: Some people like to start from the bottom and work up, while others go from one side to the other. Choose what feels comfortable for you!
💡 Pro Tip: Only hook your knots on the horizontal gridlines of your mesh.
5. Work in Sections & Take Breaks ⏳
Latch hooking is relaxing, but it’s also easy to lose track of time. Work in sections to stay organised and avoid mistakes.
✔️ Choose a small area and complete it before moving on.
✔️ Take breaks every 30–60 minutes to rest your hands and eyes.
✔️ Stretch your fingers and wrists to avoid stiffness.
💡 Pro Tip: If you make a mistake, don’t worry! Just gently pull out the yarn and redo the knot—easy fix!
6. Storing Your Project Between Sessions 📦
If you’re not finishing your project in one go (which is totally normal!), here’s how to store it safely:
👜 Fold the canvas gently or roll it up to prevent wrinkles.
📦 Keep your yarn stored neatly in small bags or containers.
🐾 Keep pets and little hands away—your hard work deserves protection!
7. Finishing Touches & Displaying Your Work 🎉
Once your project is complete, you have several options for showing it off:
🖼️ Frame it – Trim the excess canvas, attach a backing, and pop it into a frame.
🛋️ Turn it into a cushion – Sew the edges and add a pillow insert.
🚪 Make a wall hanging – Attach a dowel rod or string for easy display.
💡 Pro Tip: If your yarn looks a little uneven, give it a gentle trim with sharp scissors to even it out.
Final Thoughts: Enjoy the Process! 🧵
Latch hooking is a fun, relaxing, and rewarding craft that anyone can enjoy. Take your time, experiment, and most importantly—have fun with it!
We’d love to see your progress! Share your work with us @CraftOutletAU on Facebook and join our crafting community. 💖
Happy hooking! 🎨🧶


