How to Read and Follow Latch Hook Patterns Like a Pro
Latch Hook Pattern Guide | How to Follow Latch Hook Charts | Beginner Latch Hook Tips
If you're new to latch hooking, you might find the pattern charts a bit overwhelming at first. But don’t worry—it’s easier than it looks! Once you get the hang of reading latch hook patterns, your projects will come together smoothly, and you'll be hooking like a pro in no time. This guide will break it all down—grids, colours, and symbols—so you can tackle your next project with confidence.
What is a Latch Hook Pattern?
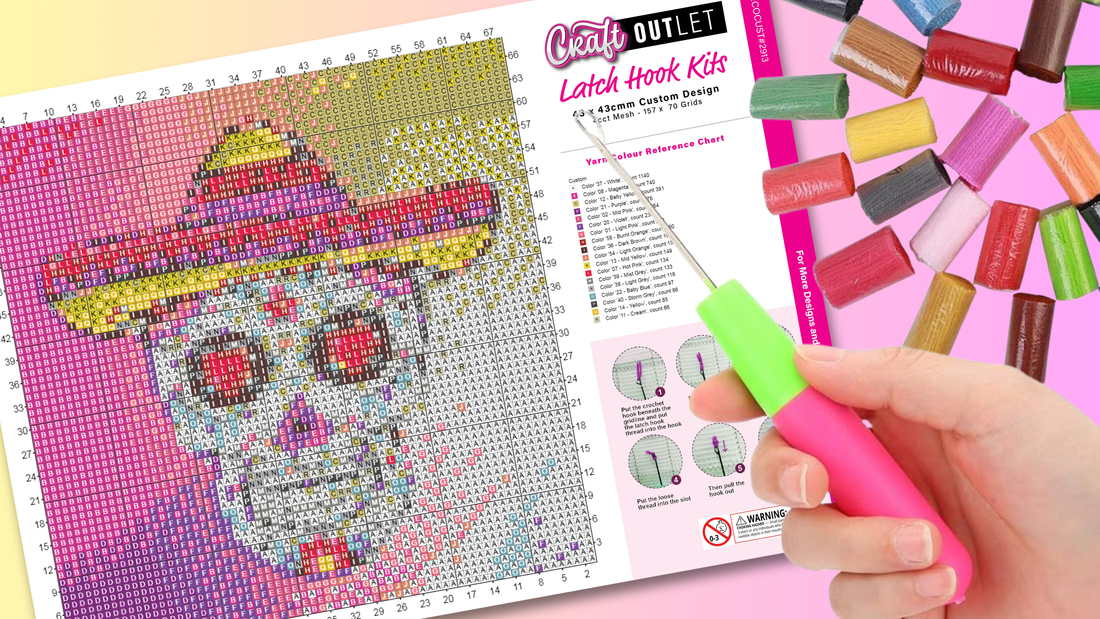
A latch hook pattern is basically a map that tells you where each piece of yarn goes on your canvas. Some are simple and use blocks of colour, while others use symbols to represent different shades of yarn. Either way, they help you bring your design to life, one knot at a time.
Most patterns include:
- A grid layout that matches the holes in your latch hook canvas.
- Colour codes or symbols that tell you what yarn to use.
- A key or legend explaining what each colour or symbol means.
- A preview of the final design, so you know what you're working towards.

Types of Latch Hook Patterns
1. Colour Block Charts
- These patterns use coloured squares to show exactly where each yarn piece goes.
- They’re beginner-friendly because you just match the yarn to the colours.
2. Symbol-Based Charts
- Instead of colours, these charts use letters, numbers, or symbols to represent yarn shades.
- You'll need to refer to a legend to know which yarn to use.
- These are great for detailed or multi-coloured designs.
3. Printed Canvas Patterns
- Some kits come with pre-printed canvases, so you just follow the design printed directly on the fabric.
- No chart-reading required, but the colours might not always be a perfect match so keep your chart handy to cross reference. Personally I always prefer to use the chart, and just use the printed canvas as a rough guide.
- Important: Before starting, count the number of squares across and down on the printed canvas. If it doesn’t match your chart, some rows may need to be ignored or marked off. This happens because parts of the printed mesh can get lost in the hemmed edges.
Step 1: Get Your Supplies Ready
Before you start, make sure you have:
- Your latch hook pattern chart
- A blank latch hook canvas
- Pre-cut latch hook yarn
- A latch hook tool
- A pen or highlighter to track your progress
Step 2: Understand the Pattern Key
Every latch hook pattern has a key or legend that explains the colours or symbols used in the chart. Before you dive in:
✅ Familiarise yourself with the colours or symbols.
✅ Organise your yarn by colour so it’s easy to grab what you need.
✅ If it helps, tape small yarn samples next to the colour key for reference.
Step 3: Find Your Starting Point
- Most latch hookers start from the bottom left corner and work their way up. This helps keep things neat and avoids tangles.
- If you’re using a colour chart, just match your yarn to the colours on the grid.
- If you have a symbol chart, check the key for which yarn colour each symbol represents.
- The great thing about our Latch Hook Kits - is that our chart is both coloured and symbolled!
- For pre-printed canvases, before you start, be sure to count all the cells across and down the mesh. If the number of grids / cells are different to your chart, then work out which rows need to be ignored or crossed out on your chart. This difference sometimes occurs due to rows of the printed mesh getting taken up in the hemmed seams.
Step 4: Work Row by Row
- Stick to one row at a time so you don’t lose track.
- Use a highlighter or sticky notes to mark rows as you complete them.
- Double-check your work every few rows to make sure your design is shaping up correctly.
Step 5: Fix Any Mistakes (Because We All Make Them!)
- If you notice a mistake, don’t stress—you can just pull out the knot and redo it.
- Take breaks so your eyes don’t get tired and mix up similar colours.
Tips for a Smooth Latch Hooking Experience
✅ Highlight Your Progress: Mark each completed row to avoid confusion.
✅ Keep Your Yarn Organised: Sorting yarn by colour speeds things up. These latch hook yarn storage containers are perfect to keep your yarn all in order!
✅ Good Lighting is Key: Helps you see small colour differences more clearly.
✅ Take Breaks: Latch hooking should be relaxing, not a marathon.
✅ Store Your Project Properly: Keep it flat when you’re not working on it to prevent knots from loosening!
Reading latch hook patterns might seem tricky at first, but once you get into the rhythm, it becomes second nature. Whether you’re using a colour block chart, symbol-based chart, or printed canvas, the key is to stay organised and take your time.
Ready to put your new skills to the test? Check out our collection of latch hook kits for beginners and seasoned crafters at Craft Outlet Australia and start your next project today!


