Top 10 Tips for Mastering Latch Hooking
Latch hooking is a versatile and creative craft that allows you to create beautiful rugs, wall hangings, and more. Whether you're a beginner or an experienced crafter, there are always new techniques and tips to explore. In this blog, we'll answer some common questions and share our top 10 tips to help you master the art of latch hooking.
1. How Do You Bind the Edges of a Latch Hook Rug?
Binding the edges of your latch hook rug is essential to prevent fraying and give your project a polished finish. Here’s how you can do it:
- Folding and Hemming: Fold the edges of the canvas back about an inch and sew them down with a strong thread. This method works well for small to medium-sized projects.
- Using Binding Tape: You can use binding tape, which is available in various colours. Simply fold it over the edges and sew it in place. This adds a neat, professional look and extra durability.
- Hot Glue Method: For a quick and easy option, you can apply hot glue along the edges and fold the canvas over. Be sure to press down firmly and let it cool completely before handling.
2. Are There Specific Techniques for Starting and Finishing a Latch Hook Project?
Starting and finishing your latch hook project correctly ensures a neat and durable result. Here are some tips:
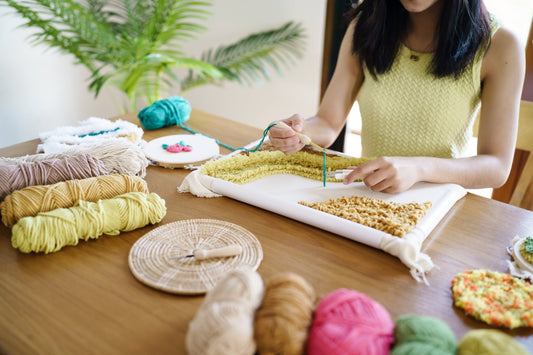
- Starting: Begin at the bottom right corner of your canvas (if you're right-handed) to avoid working over your completed work. Secure the canvas in a frame or use masking tape around the edges to prevent unraveling.
- Finishing: Once you've completed the hooking, trim any excess yarn and ensure all loops are uniform. You can also add a backing fabric to protect the yarn and give your project a finished look. For added durability, especially for rugs, consider using an anti-slip backing.
3. Is It Possible to Create 3D or Textured Effects with Latch Hooking?
Absolutely! Creating 3D or textured effects can add depth and interest to your latch hook projects. Here’s how you can achieve these effects:
- Varying Loop Lengths: By cutting your yarn to different lengths, you can create raised areas or textures within your design. For example, shorter loops can represent background elements, while longer loops can make features pop out.
- Using Different Yarn Types: Mixing different types of yarn, such as combining wool with acrylic, can create interesting textures. This technique is great for adding dimension and tactile elements to your projects.
- Incorporating Other Materials: Don't be afraid to experiment with materials like ribbon, felt, or even beads. These can be hooked in just like yarn and can add a unique touch to your piece.
4. Do You Start at the Top or Bottom of a Latch Hook?
The choice of starting point can vary depending on personal preference and the design you're working on. However, here are some general guidelines:
- Starting at the Bottom: Starting from the bottom and working upwards is often recommended, especially for beginners. This approach helps keep the yarn from getting tangled or caught in your completed work.
- Starting at the Top: Some crafters prefer to start at the top, especially when working on detailed or complex designs. This method allows for easier adjustments as you can see the overall progress and alignment of your design.
5. Tip for Organizing Your Latch Hook Yarn Colours
Keeping your yarn colours organized can save time and help prevent mistakes. Use small containers, bags, or a craft organiser with compartments to separate your yarn by colour. Our stackable and easy to carry latch hook yarn organiser is great to keep your yarn in order: Labelling each section with the corresponding pattern code can also be helpful, especially for more complex designs.
6. Choosing the Right Canvas for Your Project
The type of canvas you use can affect both the look and feel of your finished piece. Choose a canvas that matches the size and detail of your design. Typically we recommend a 3.75CT latch hook mesh with a 5-6 ply yarn to achieve a plush latch hook rug! For more intricate patterns, a finer mesh canvas can provide better detail. For larger, more robust projects, a sturdier canvas with larger holes can make the hooking process easier. Some blank latch hook canvas even come already hemmed and fitted with a non slip backing!
7. How to Prevent Yarn from Fraying and Shedding
Fraying and shedding can be common issues when working with yarn, but there are ways to minimize these problems. When cutting yarn, use sharp scissors to get a clean edge, which helps prevent fraying. Some crafters also apply a small amount of clear glue or fray check to the ends of the yarn. To reduce shedding, consider using yarn with a tighter twist or a smoother texture. Regularly shaking out your project during and after completion can also help remove loose fibres.
8. Creating Custom Patterns
Creating your own patterns can add a personal touch to your projects. Use graph paper or digital tools to sketch out your design, and then plan your yarn colours and textures. Custom patterns are great for making one-of-a-kind gifts or décor items. Not only can you create your own custom latch hook patterns. you can also turn your favourite photo into a personalised latch hook kit!
9. How to Care for Your Finished Latch Hook Projects
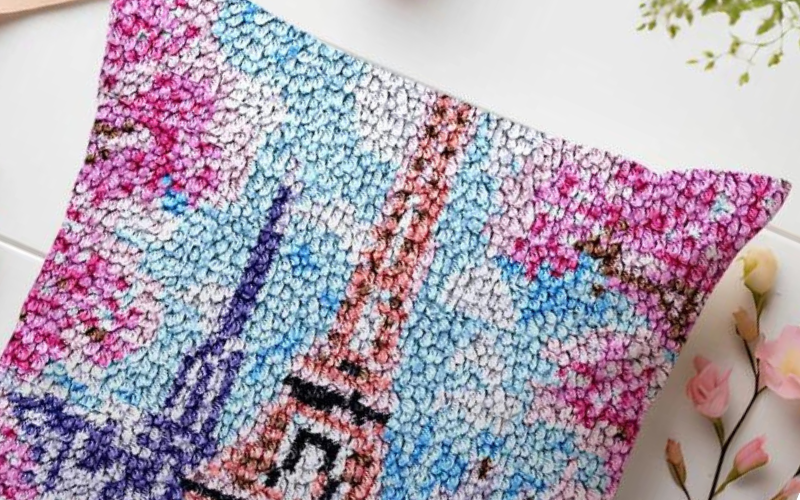
After completing your project, it's important to care for it properly to ensure its longevity. We recommend to only hand wash or dry clean latch hook rugs and cushions. This reduces the risk of damaging your piece of art that took hours to make. Use luke warm water and try to avoid harsh detergents. Dry by pressing your rug in between two beach towels and gently press.
10. Storing and Displaying Your Finished Projects
Proper storage and display can help preserve your completed projects. Store flat pieces in a cool, dry place, and avoid folding them to prevent creases. For display, consider framing smaller pieces or hanging larger ones with a dowel rod or decorative hanger.
These tips should help you enhance your latch hooking skills and achieve professional-looking results. Whether you're creating a simple rug or a complex wall hanging, these techniques will help you get the most out of your latch hooking projects. Happy crafting!


